Table of Content
To add, edit, or delete a category and its subcategory in OpenCart, follow these steps:
1. Adding a Category
- Log in to the Admin Panel: Go to your OpenCart admin panel (e.g.,
http://yourstore.com/admin). - Navigate to Categories:
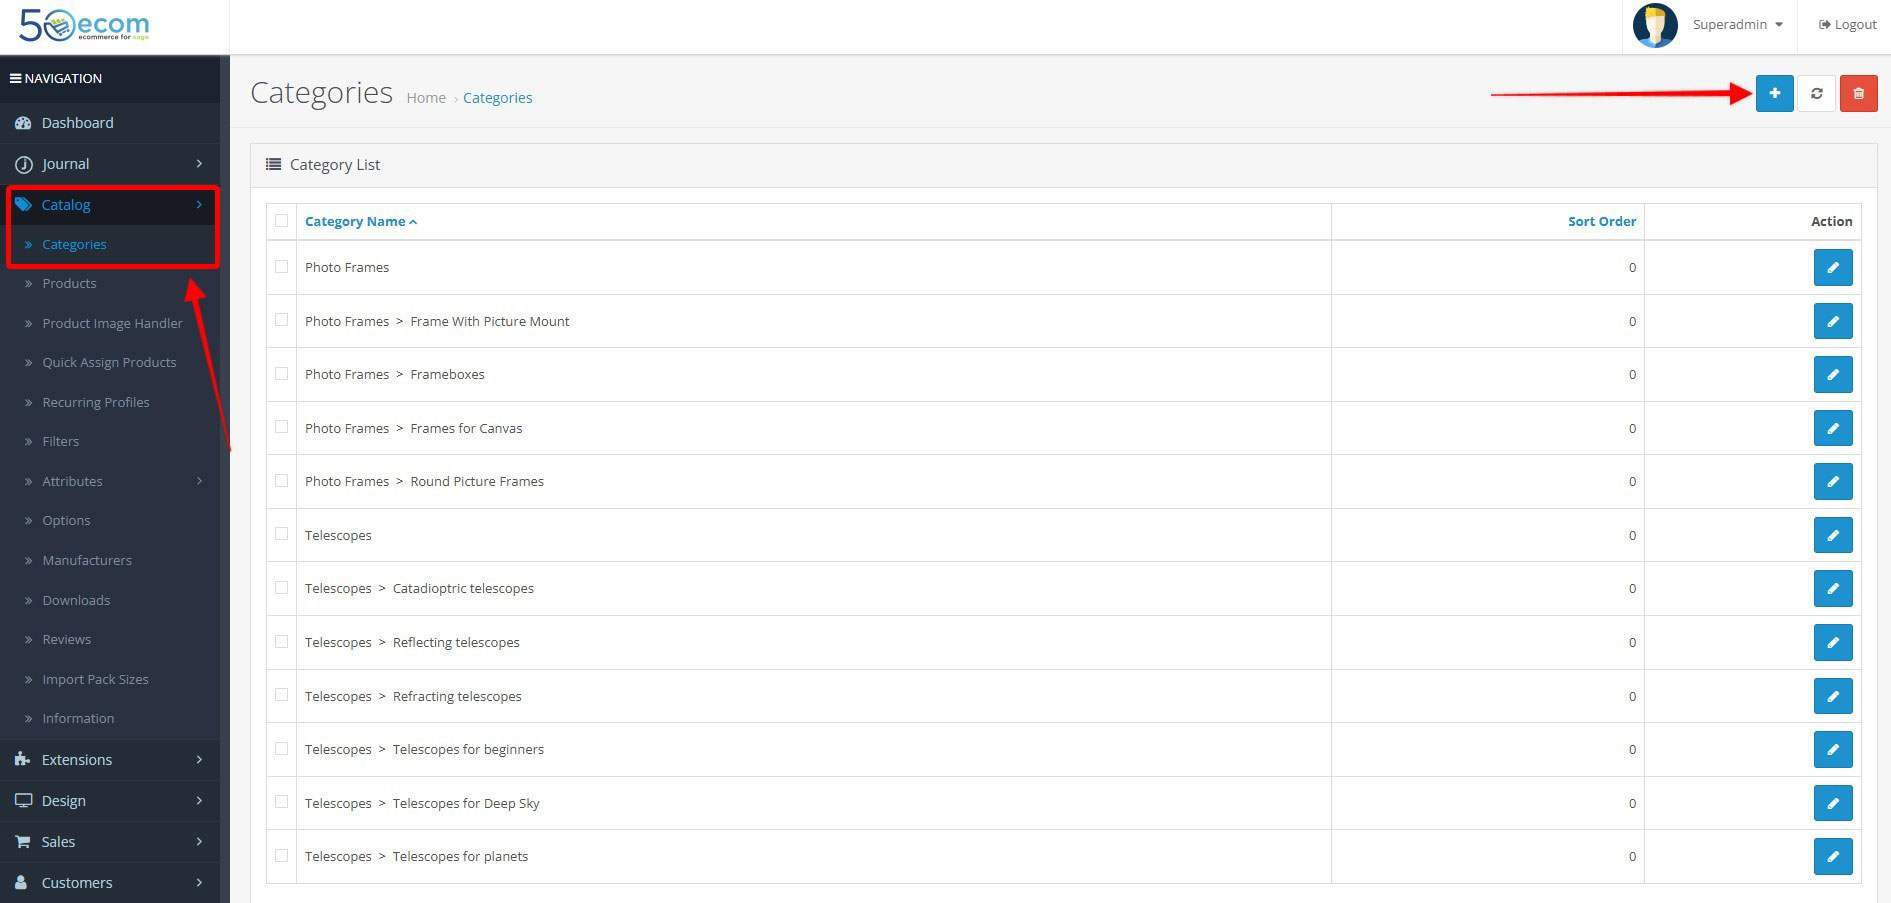
- In the left sidebar, click on Catalog.
- Then click on Categories under the "Catalog" section.
- Add a New Category:
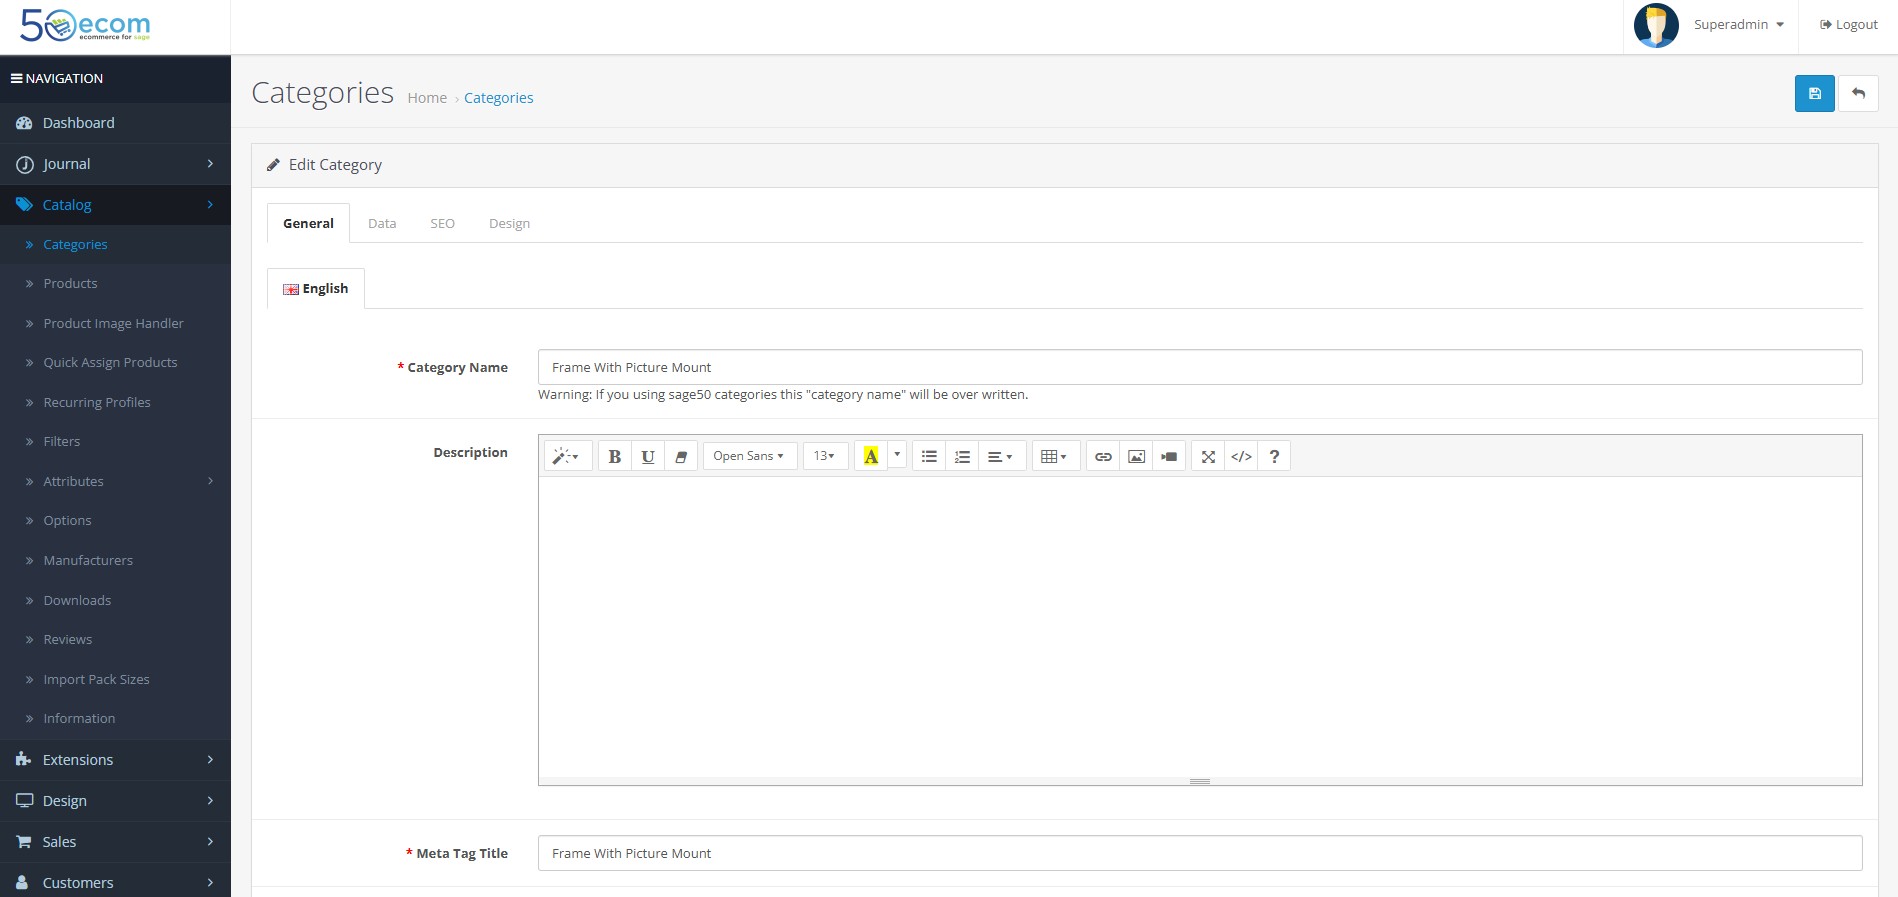
- Fill in Category Details:
- Category Name: Enter the name of the category.
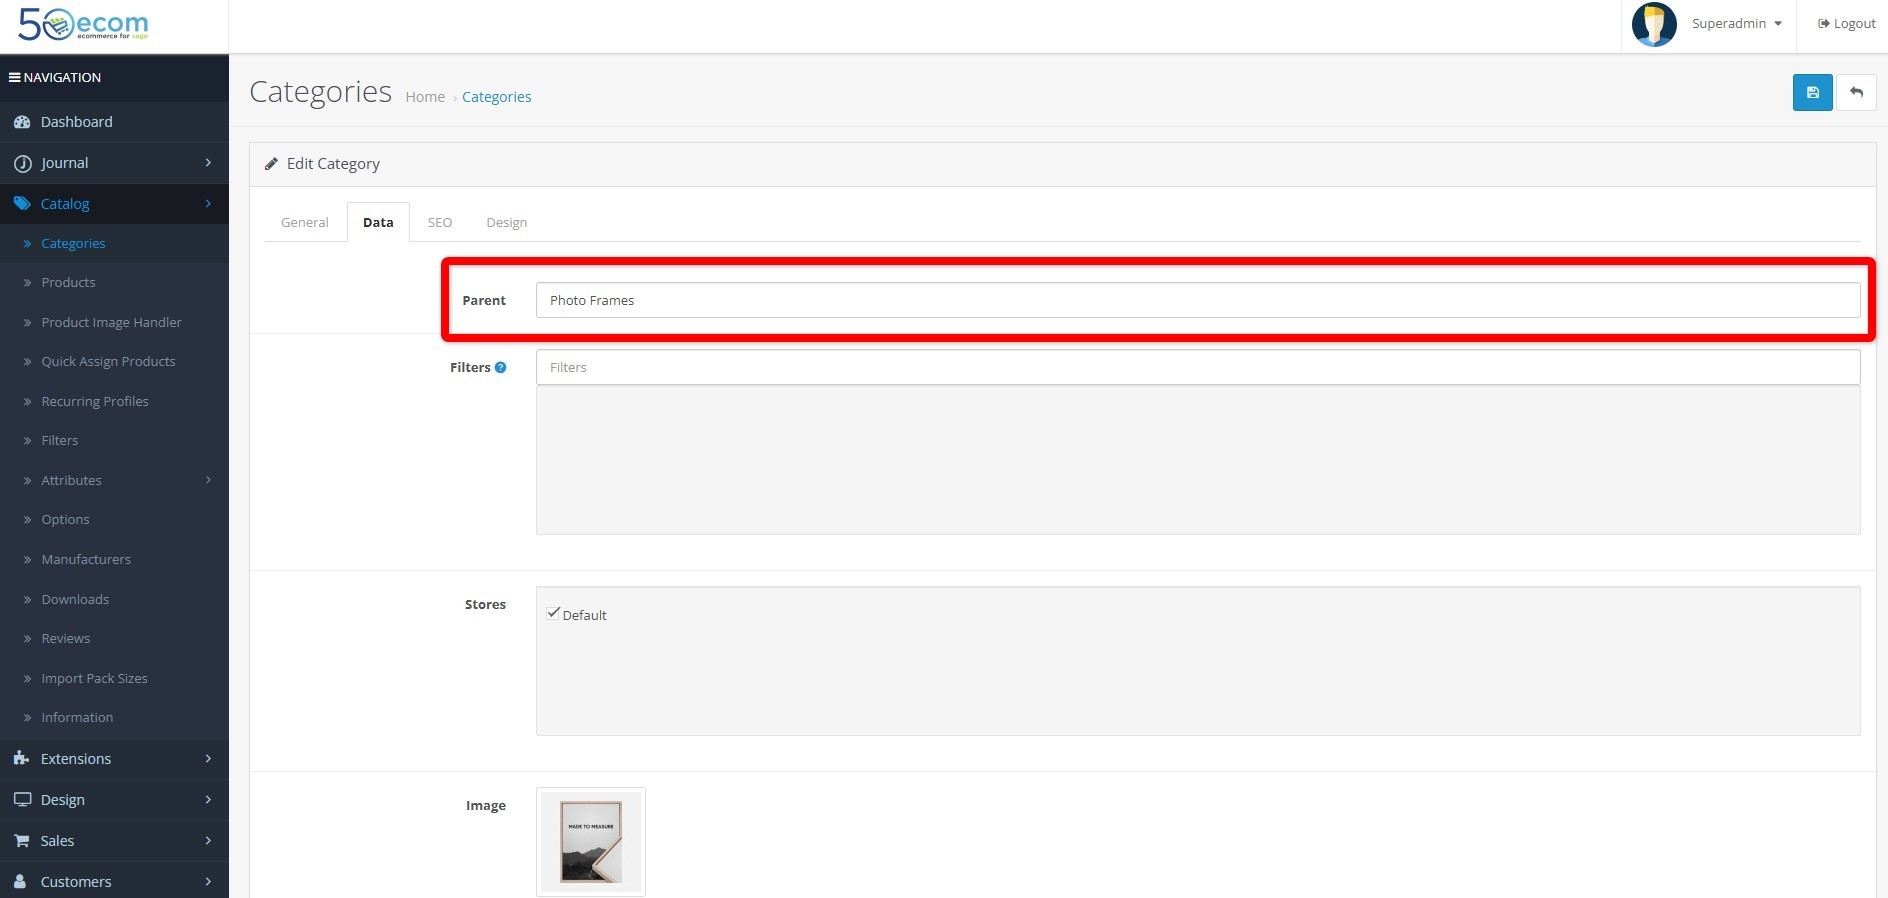
- Parent Category: If it's a subcategory, select the parent category from the dropdown list. If it's a main category, leave it as "None".
- Description: Add a description for the category.
- Meta Tags: (Optional) Add meta tags for SEO purposes.
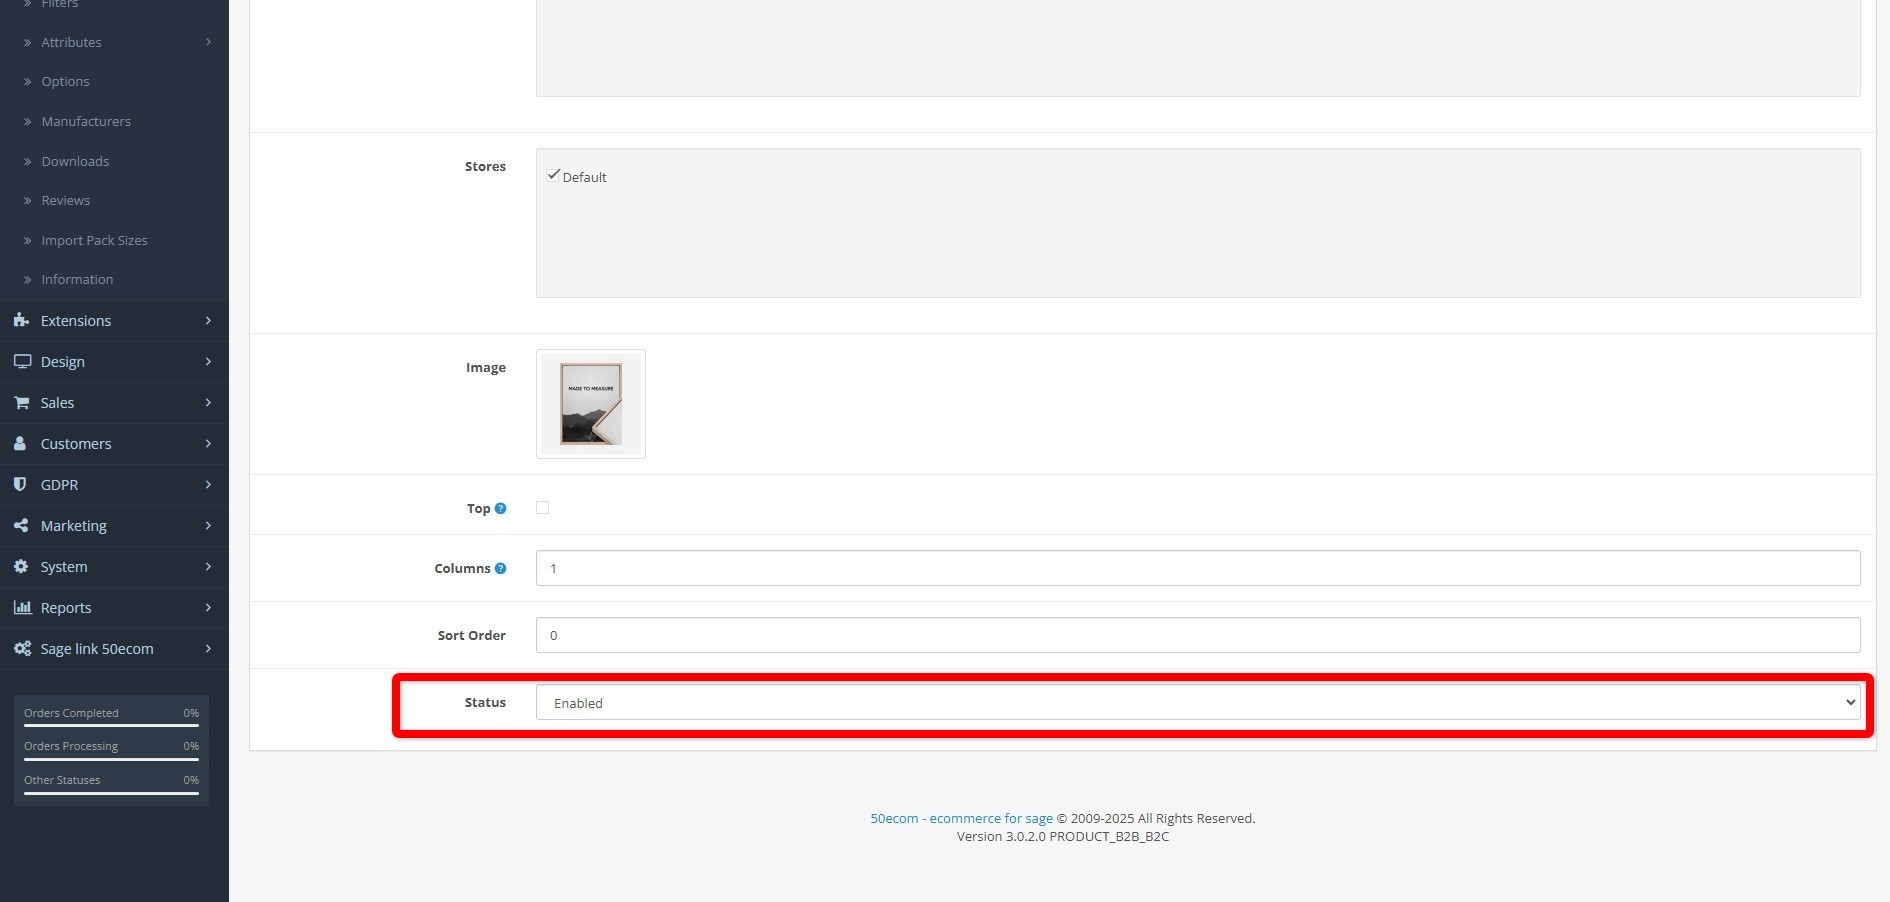
- Sort Order: (Optional) Set a sort order for how the category will appear in the front-end.
- Status: Set the category to Enabled if you want it to appear on the site.
- Category Name: Enter the name of the category.
- Save: Once you've entered the necessary details, click Save in the top right corner.
2. Editing a Category
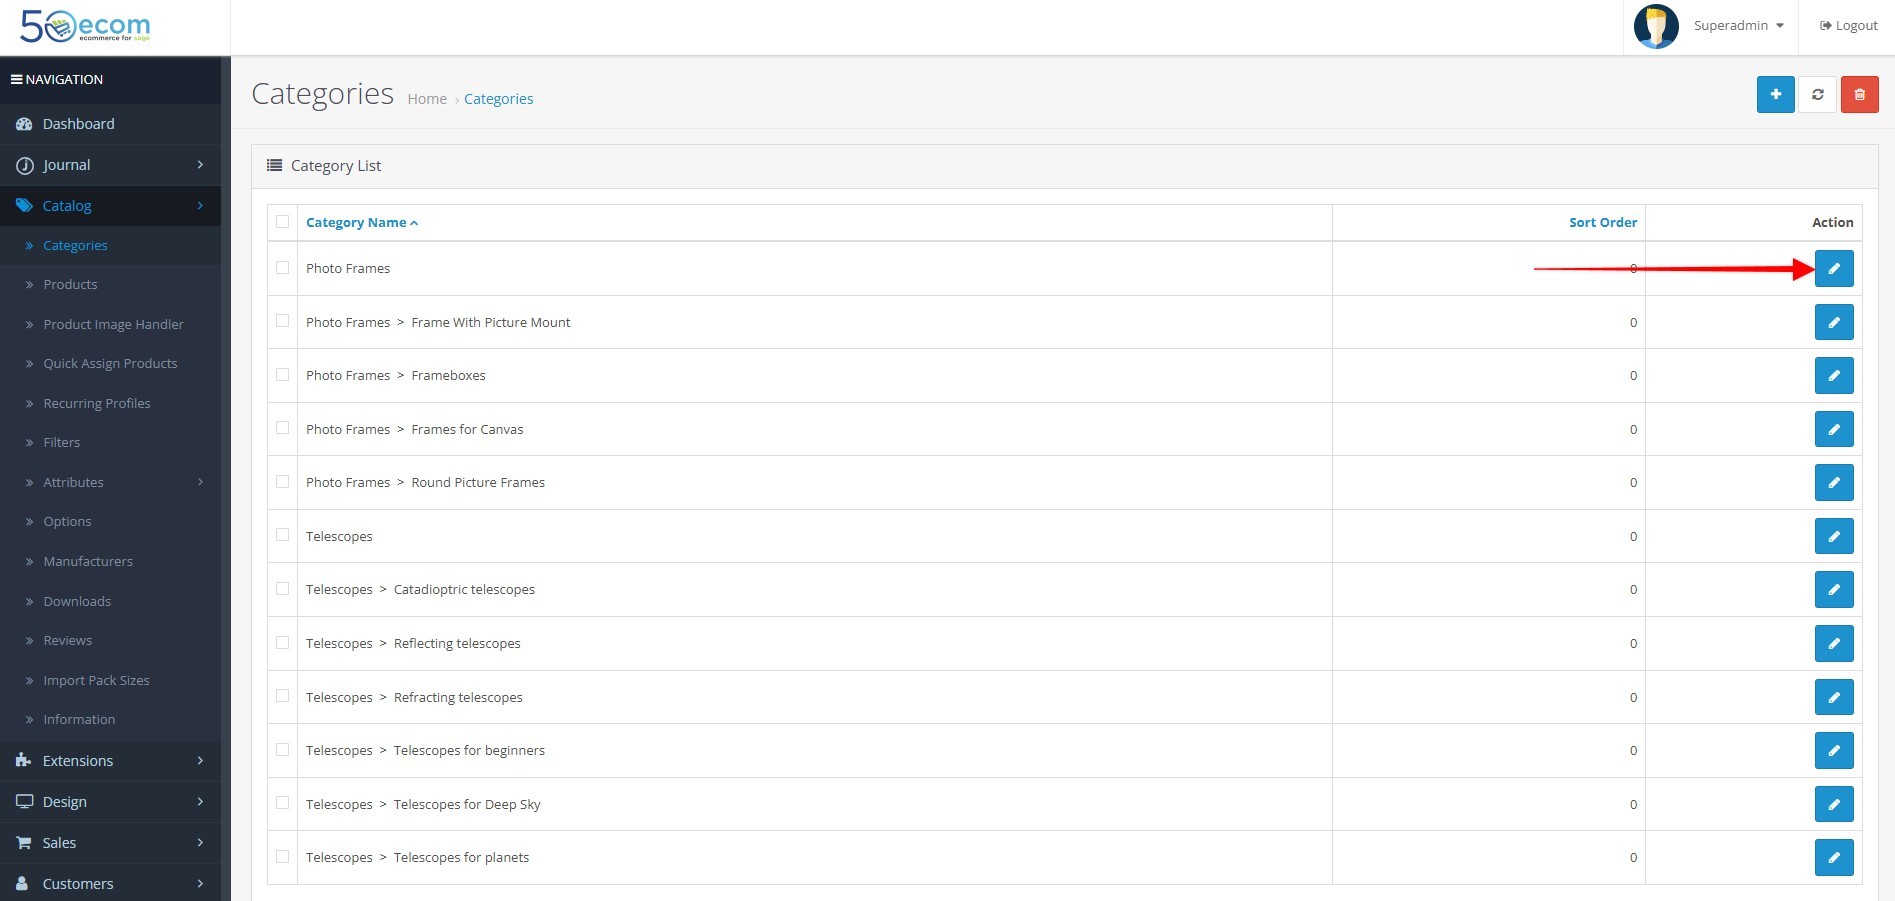
- Select the Category:
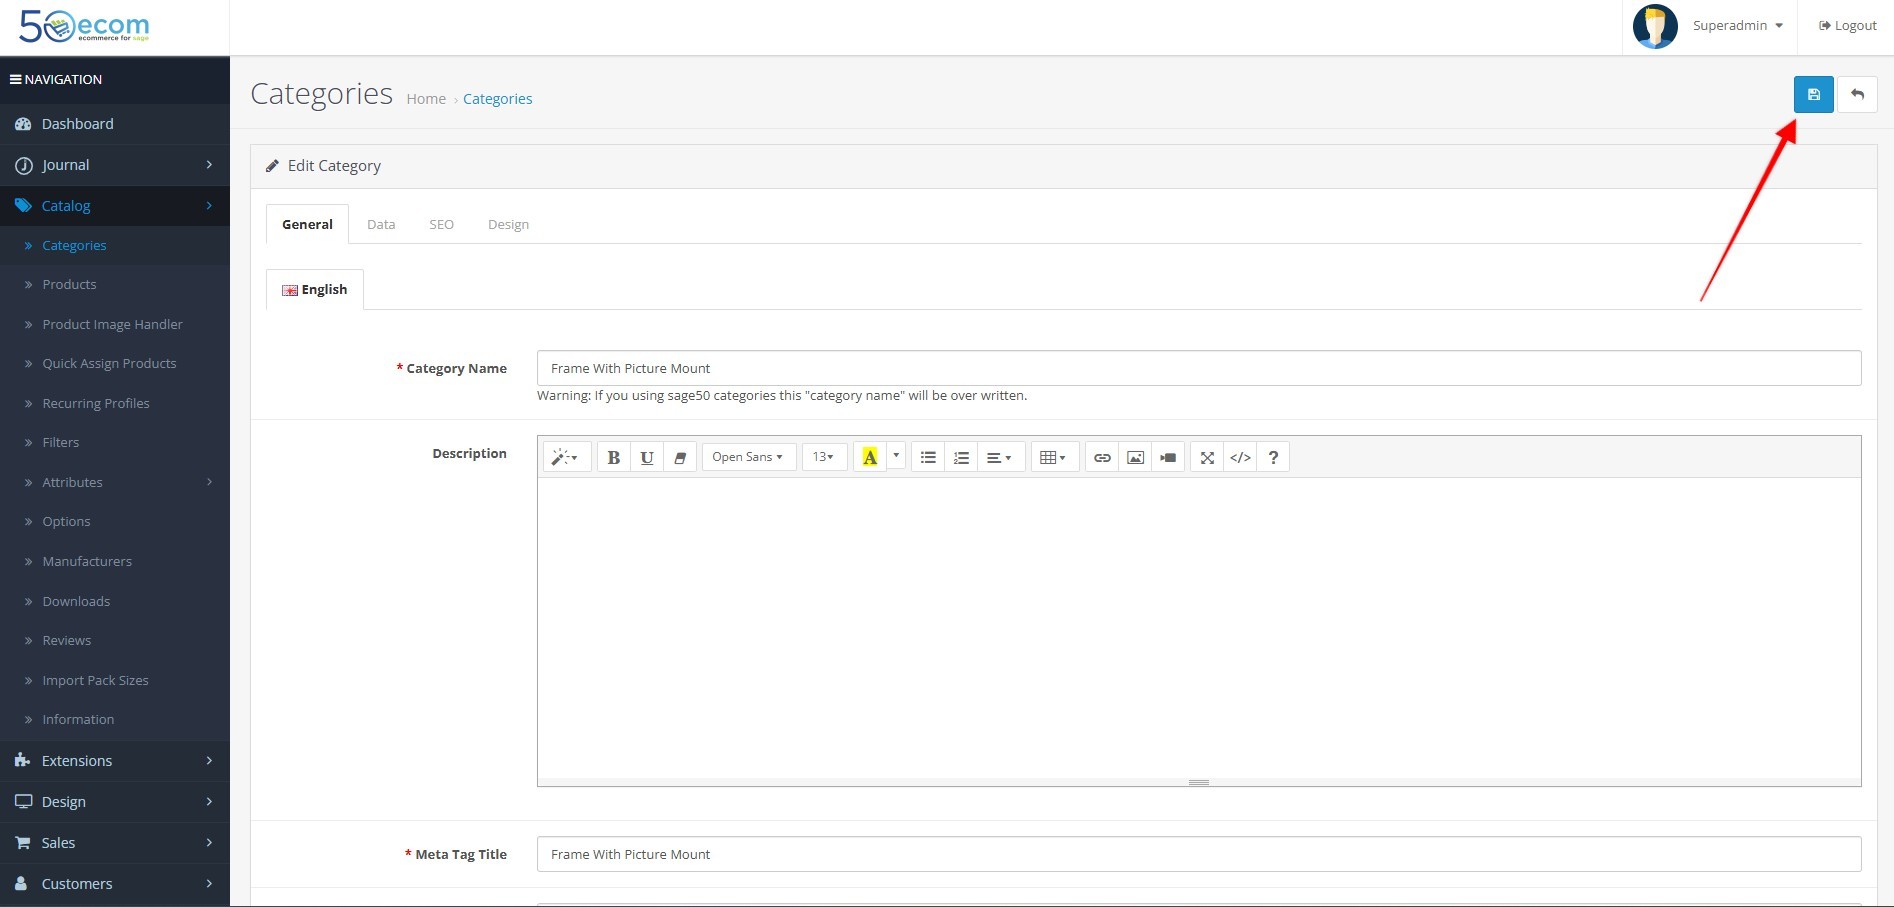
- Make Changes:
- You can update the name, description, parent category (if you want to change it to a subcategory), status, or any other information related to the category.
- Save: After making the changes, click Save in the top right corner.
3. Deleting a Category
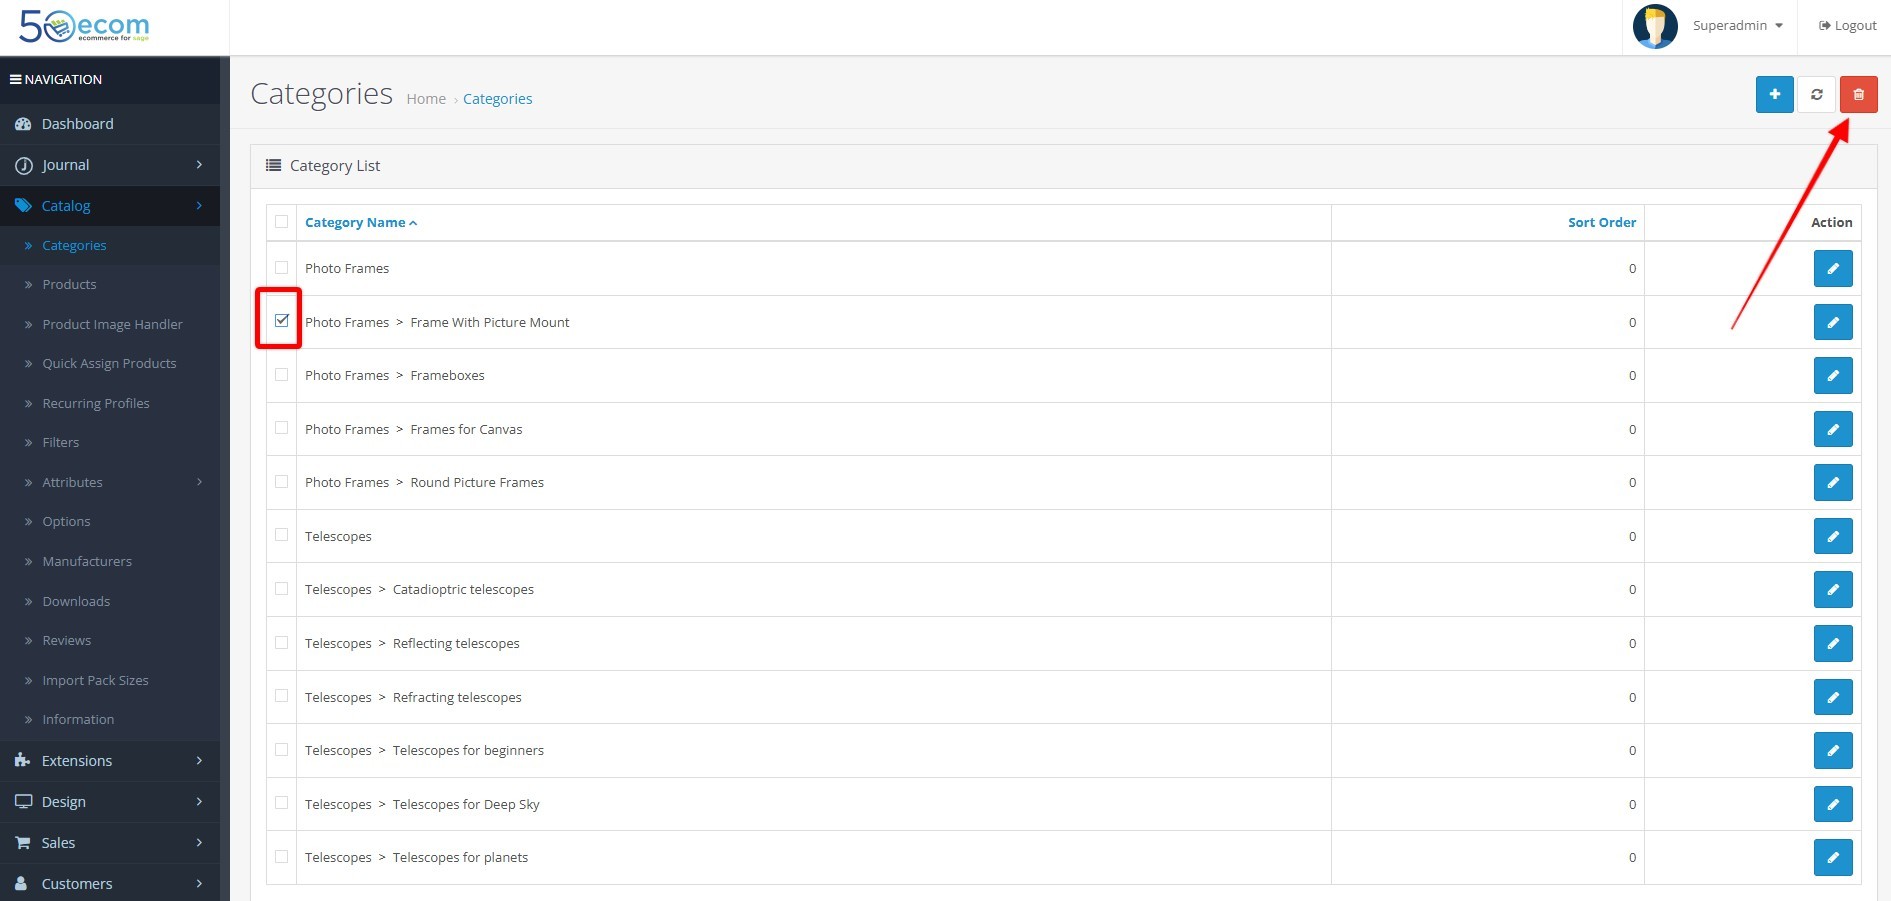
- Select the Category:
- Delete:
- Click the Delete button at the top of the page.
- A confirmation prompt will appear; click OK to confirm the deletion.
4. Adding a Subcategory
- To add a subcategory, follow the same process as adding a category, but:
- Save: After setting the parent category and other details, click Save.
Additional Tips:
- Sorting Categories: You can change the order of categories and subcategories by setting the Sort Order value when adding or editing a category. Categories with a lower sort order number will appear first.
- SEO: For SEO optimization, ensure that you add relevant keywords in the Meta Tags section and write clear, concise descriptions for each category and subcategory.

